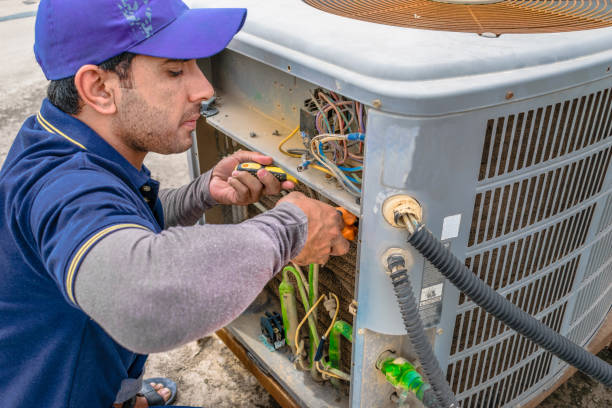
Efficient heating, ventilation, and air conditioning (HVAC) systems are essential for maintaining comfort while reducing energy consumption. Installing a new HVAC system can significantly improve energy efficiency, leading to lower utility bills and a reduced carbon footprint. Below is an in-depth look at how to maximize energy efficiency when upgrading your HVAC system.
Benefits of Installing a New HVAC System
Replacing an outdated or inefficient system with a modern one offers several advantages:
– Lower Energy Costs: Modern units use advanced technologies to reduce power consumption.
Improved Indoor Comfort: Better temperature control and humidity management improve overall living conditions.
Environmental Benefits: Energy-efficient systems reduce greenhouse gas emissions.
Enhanced Reliability: New systems come with fewer maintenance issues compared to older models.
Tips for Choosing an Energy-Efficient HVAC System
- Look for ENERGY STAR® Certification
ENERGY STAR-certified systems meet strict efficiency guidelines set by the Environmental Protection Agency (EPA). These units use less energy than standard models without compromising performance. - Check SEER Ratings
The Seasonal Energy Efficiency Ratio (SEER) measures the cooling efficiency of an air conditioning system. Higher SEER ratings indicate better efficiency. - Opt for Variable-Speed Technology
Modern systems often come equipped with variable-speed compressors and fans that adjust their speed based on demand, reducing unnecessary energy usage. - Consider Zoned Systems
Zoned systems divide your home into different zones with independent temperature controls. - Choose Smart Thermostats
Pairing your new HVAC system with a smart thermostat enables precise temperature control and scheduling capabilities, further optimizing energy use.
Proper Installation is Key
Even the most efficient HVAC systems will underperform if not installed correctly. Hiring a licensed contractor ensures proper sizing, ductwork design, and calibration of components like thermostats and refrigerant levels.
Poor installation can lead to:
– Increased operational costs due to inefficiency.
– Shortened lifespan of the equipment.
– Unbalanced airflow or poor indoor air quality.
Maintenance Matters
After installation, routine maintenance is vital for sustaining optimal performance over time:
– Replace air filters every 1–3 months to maintain good airflow.
– Clean condenser coils annually to prevent dirt buildup.
– Inspect ducts for leaks or blockages that can waste conditioned air.
| Maintenance Task | Frequency |
| Replace Air Filters | Monthly/Quarterly |
| Inspect Ducts | Annually |
| Clean Condenser Coils | Annually |
| Schedule Professional Tune-Up | Annually |
Installing a new HVAC system is one of the most effective ways to enhance energy efficiency in your home while improving comfort levels year-round. By carefully selecting an ENERGY STAR-rated unit, ensuring professional installation, and committing to regular maintenance practices, homeowners can enjoy long-term savings on both their utility bills and repair costs while contributing positively toward environmental sustainability.
Top Signs You May Need Air Conditioning Repair Miami Experts Immediately
Air conditioning units are critical for maintaining comfort in homes and businesses, especially during warmer months. However, like any mechanical system, they have a finite lifespan. Ignoring the warning signs of a failing air conditioning unit can lead to higher energy bills, poor indoor air quality, and unexpected breakdowns. Below are five key indicators that it may be time to replace your air conditioning unit.
1.Insufficient Cooling Performance
One of the most apparent signs that your air conditioner might need replacement is its inability to cool your space effectively. If you notice uneven cooling across rooms or that your AC takes longer than usual to reach the desired temperature, there may be underlying mechanical or efficiency issues.
- Compressor failure
- Low refrigerant levels
- Aging equipment unable to meet cooling demands
While routine maintenance can address minor issues, persistent inefficiencies often signal the need for a new system.
2.Frequent Repairs
If you find yourself calling for HVAC repairs multiple times a year, it’s worth considering whether a replacement would be more cost-effective. Constant fixes not only add up financially but also indicate that your system is nearing the end of its functional life.
- If repair expenses exceed 50%of the cost of a new unit, replacement is usually the smarter choice.
3.Rising Energy Bills
An unexplained increase in energy costs could point to an aging and inefficient air conditioning system. Older units often lose efficiency over time due to wear and tear or outdated technology.
- A steady increase in monthly utility bills compared to previous years
- Energy consumption spikes during normal operation
Upgrading to a modern HVAC system with higher Seasonal Energy Efficiency Ratio (SEER) ratings could significantly lower energy use and costs.
4.Unusual Noises or Odors
New or excessively loud noises such as grinding, rattling, or squealing from your AC unit suggest internal components might be failing. Similarly, unpleasant odors—whether musty or burning—can indicate serious issues like mold growth in ducts or overheating electrical parts.
| Noise Type | Likely Cause | Recommended Action |
| Grinding | Motor bearings wearing out | Consult an HVAC technician |
| Rattling | Loose internal components | Schedule an inspection |
| Squealing | Belt problems | Replace worn-out parts |
5.Unit Age Exceeding Lifespan
Most air conditioning systems are designed to last between 12–15 years with proper maintenance. If your unit is nearing or surpassing this age range and exhibits other warning signs mentioned above, replacing it can save you from escalating repair costs and inefficiencies.
- Depreciated energy efficiency
- Outdated refrigerants like R-22 (phased out due to environmental regulations)
Modern systems built with eco-friendly refrigerants and advanced technologies offer improved performance while minimizing environmental impact.
Replacing an outdated air conditioning unit may seem like a significant upfront investment; however, recognizing these warning signals early can prevent costly emergencies down the road while improving comfort and energy efficiency in your space. Hiring an experienced HVAC contractor ensures you select the right system tailored to your needs while ensuring professional installation practices.
Why AC Repair Miami Experts Recommend Replacing a Faulty TXV in Your HVAC System
The thermostatic expansion valve (TXV) is a critical component of an HVAC system. It regulates the flow of refrigerant into the evaporator, ensuring efficient heat exchange and consistent cooling performance. A faulty TXV can significantly reduce your system’s efficiency, increase energy bills, and lead to potential damage to other components. Recognizing the importance of replacing a malfunctioning TXV is essential for both homeowners and HVAC professionals alike.
What Is a TXV and Its Role?
The TXV is responsible for controlling the amount of refrigerant that enters the evaporator coil based on cooling demand. It adjusts refrigerant flow by responding to changes in pressure and temperature within the system.
- Regulating Refrigerant Flow: Prevents overfeeding or underfeeding refrigerant to maintain efficiency.
- Maintaining Proper Superheat Levels: Protects against compressor damage caused by liquid refrigerant entering it.
- Improving Energy Efficiency: Ensures consistent cooling performance with minimal energy wastage.
Signs Your TXV May Be Faulty
A malfunctioning TXV can present several noticeable signs within your HVAC system.
- Inconsistent Cooling or Heating: Uneven temperatures throughout your home may indicate improper refrigerant flow.
- Increased Energy Bills: A struggling HVAC system with a faulty TXV often consumes more electricity as it works harder than necessary.
- Frost on Evaporator Coils: Excessive frost buildup occurs when insufficient refrigerant flows into the evaporator.
- Unusual Noises: Whistling or hissing sounds may suggest pressure imbalances caused by a failing TXV.
- System Short Cycling: Frequent turning on and off of your unit could indicate issues with proper refrigerant regulation.
Why Replacing a Faulty TXV Matters
- Compressor failure resulting from improper heat exchange.
- Reduced lifespan of other components due to increased strain.
- Higher operational costs due to inefficient cooling performance.
- Decreased comfort levels within your home environment.
Replacing a defective TXV not only restores efficiency but also extends your system’s lifespan while preventing frequent repairs.
Steps for Diagnosing and Replacing a Faulty TXV
Replacing a thermostatic expansion valve requires expertise, making it imperative you engage with an experienced HVAC contractor when needed.
| Step | Action Description |
| 1 | Conduct thorough inspection for leaks or blockages in the refrigeration lines. |
| 2 | Measure superheat levels using pressure gauges and thermometers to confirm irregularities caused by faulty operation. |
| 3 | Recover existing refrigerant safely before removing defective parts like filters/strainers if needed along w/ (TXVs). |
| 4.Replacement technicians follow recommended specs ensuring compatible replacements |
Understanding the Role of a Capacitor in Your HVAC System from a Trusted HVAC Company Miami, FL
Capacitors are one of the most critical components in an HVAC system. These small, cylindrical devices store and release electrical energy to help power the system’s motors, ensuring smooth and efficient operation. Despite their modest size, capacitors play a key role in maintaining the performance and longevity of an HVAC unit. Understanding their function, types, and signs of failure can help homeowners and contractors troubleshoot issues promptly.
What Does a Capacitor Do in an HVAC System?
Capacitors serve as energy storage devices that supply a quick burst of electricity to start or maintain the operation of various motors within your HVAC system.
- Compressor Motor: The primary motor responsible for compressing refrigerant.
- Fan Motor: Powers the fan that circulates air through the system.
- Blower Motor: Drives air movement through ductwork.
Without a properly functioning capacitor, these motors may fail to start or run efficiently, leading to reduced performance or complete system failure.
Types of Capacitors Found in HVAC Systems
- Provide a high-energy boost to kickstart the motor.
- Operate only for a short duration during startup.
- Maintain consistent electrical current once the motor is running.
- Operate continuously while the motor is active.
Each type is essential for different phases of motor operation, and both must be functional for optimal system performance.
Signs That Your Capacitor May Be Failing

A failing capacitor can lead to various issues with your HVAC unit.
- Difficulty Starting: Motors fail to start or take longer than usual.
- Frequent Cycling: The system turns on and off more frequently than normal.
- Humming Noise: A noticeable humming sound coming from your unit could point to capacitor failure.
- Warm Air Blowing Instead of Cool Air: If your air conditioner blows warm air despite being on cooling mode, it may be due to a faulty compressor capacitor.
- Burned or Swollen Components: Visible signs such as bulging or burnt marks on the capacitor casing indicate physical damage.
Addressing these issues promptly can prevent further damage to your HVAC unit.
How to Properly Maintain Your HVAC Capacitor
Regular maintenance is essential for ensuring long-lasting performance.
- Schedule routine inspections by a licensed HVAC contractor at least once per year.
- Replace capacitors showing visible wear or damage as soon as possible.
- Keep your outdoor condenser unit clean and free from debris to reduce strain on components like capacitors.
| Maintenance Task | Frequency | Performed By |
| Inspect capacitors | Annual | Licensed technician |
| Clean condenser coils | Every 3 months | Homeowner/technician |
| Check electrical connections | During tune-ups | Technician |
Why Timely Replacement Is Crucial
A faulty capacitor not only hampers performance but also risks damaging other key components like compressors or motors due to increased stress. Timely replacement prevents costly repairs down the line by maintaining consistent energy flow through your system.
Understanding what a capacitor does in an HVAC unit helps ensure you stay proactive about maintenance needs while enjoying efficient heating and cooling throughout the year. Regular upkeep ensures that this small but vital component continues performing its job effectively.
Why Choosing Tankless Hot Water Heaters Is Ideal for AC Replacement Miami Homes
Key Benefits of Tankless Hot Water Heaters
- Traditional storage water heaters maintain a reservoir of hot water, leading to “standby heat loss” as energy is consumed to keep the water warm even when it’s not being used.
- Tankless systems eliminate this inefficiency since they heat water as it flows through the unit, reducing overall energy consumption.
- Many tankless models are ENERGY STAR® certified and can reduce energy usage by up to 30%.
- With tank-based systems, the hot water supply is limited to the size of the storage tank. Once depleted, there’s a waiting period for reheating.
- Tankless systems are significantly smaller than traditional tanks and can be mounted on walls, freeing up valuable floor space in utility rooms or basements.
- Their compact design makes them an excellent choice for homes with limited space.
- While traditional tanks typically last around 10–15 years, tankless models can last 20 years or more with proper maintenance, offering long-term cost savings.
Additional Considerations When Choosing a Tankless System
| Feature | Traditional Water Heater | Tankless Water Heater |
| Energy Efficiency | Moderate (due to standby heat loss) | High (on-demand heating) |
| Hot Water Supply | Limited by tank capacity | Unlimited |
| Size | Large (requires more space) | Compact (wall-mounted) |
| Lifespan | 10–15 years | 20+ years |
| Upfront Cost | Lower | Higher |
| Long-Term Savings | Moderate | Significant |
Factors to Keep in Mind Before Installation
- Upfront Cost: The initial installation cost is higher than that of traditional models due to equipment price and potential electrical or gas line upgrades.
- Flow Rate: Ensure you select a unit with an adequate flow rate (measured in gallons per minute—GPM) based on household size and simultaneous usage.
- Utility Compatibility: Check whether your home’s electrical system or gas lines can support the requirements of your chosen unit.
Environmental Impact
By reducing energy consumption compared to their traditional counterparts, tankless hot water heaters not only lower utility bills but also contribute positively to environmental sustainability by decreasing greenhouse gas emissions associated with home heating.
Switching to a tankless hot water heater is an investment that pays off in terms of efficiency, performance, and comfort over time when properly maintained and installed by experienced professionals.
How Hyper-Heat Mini Split Systems Can Improve Heating Efficiency in Harsh Weather Conditions
Hyper-heat mini split systems are an innovative solution designed to provide efficient heating in extreme weather conditions. Unlike traditional HVAC systems, these units are engineered to deliver consistent performance even when outdoor temperatures plummet. They are particularly beneficial for homeowners in regions that experience long, harsh winters. Let’s dive into how they work and the specific advantages they offer.
What Are Hyper-Heat Mini Split Systems?
Hyper-heat mini split systems are advanced ductless heating and cooling systems that use heat pump technology to efficiently transfer heat from one place to another. These systems are specifically designed to operate effectively in temperatures as low as -13°F (-25°C).
Key components of a hyper-heat system include:
– Outdoor Unit: Captures heat from the outside air.
Indoor Unit(s): Disperses the collected heat within your home.
Refrigerant Lines: Transfers heat between the indoor and outdoor units.
Inverter Technology: Allows for variable-speed operation, optimizing energy efficiency.
Benefits of Hyper-Heat Mini Split Systems
- Hyper-heat systems maintain high efficiency even in sub-zero temperatures.
- Unlike conventional heat pumps, they do not require supplemental heating sources like electric resistance heaters or propane furnaces.
- With inverter technology, these systems adjust their output based on real-time heating demands, reducing energy waste.
- Many hyper-heat models boast high Heating Seasonal Performance Factor (HSPF) ratings, translating into lower utility bills.
- Each indoor unit can be independently controlled, allowing for customized temperature settings in different rooms or zones.
- Ductless installation eliminates the need for bulky ductwork, making it easier to retrofit older homes or add heating capabilities to specific areas such as basements or additions.
How Hyper-Heaters Compare to Traditional Heat Pumps
| Feature | Traditional Heat Pump | Hyper-Heat Mini Split System |
| Minimum Operating Temp | Around 32°F (0°C) | As low as -13°F (-25°C) |
| Heating Efficiency | Reduced below freezing temps | Maintains efficiency at low temps |
| Supplemental Heating Needed? | Often required | Rarely needed |
Additional Considerations for Installation
When installing a hyper-heat mini split system, proper sizing is critical. A professional HVAC contractor will:
1. Calculate your home’s heating load using Manual J calculations.
2. Evaluate insulation quality and air sealing in your home to ensure optimal performance.
3. Recommend proper placement of indoor and outdoor units to maximize airflow and minimize noise disruption.
Is a Hyper-Heat System Right for You?
If you live in a region with severe winters and want an energy-efficient solution for reliable indoor comfort, a hyper-heat mini split system could be an ideal choice. By investing in this advanced technology, you can enjoy consistent warmth while reducing your environmental footprint and monthly utility costs.
The Key Differences Between SEER and EER Ratings for Choosing Efficient Cooling Systems
When selecting a cooling system, understanding energy efficiency ratings is crucial to ensure you’re making the best decision. Two of the primary metrics used to measure an air conditioning system’s efficiency are SEER (Seasonal Energy Efficiency Ratio) and EER (Energy Efficiency Ratio). While they may sound similar, these ratings have distinct purposes and applications. Knowing the differences can help you choose a system that meets your cooling needs while optimizing energy performance.
What is SEER?
SEER stands for Seasonal Energy Efficiency Ratio. It measures the cooling efficiency of an air conditioner over an entire cooling season, taking into account temperature fluctuations throughout the year.
- Seasonal Average: Reflects efficiency over varying weather conditions.
- Higher Is Better: A higher SEER rating indicates better energy efficiency.
- Standard Ratings: Modern systems typically range between 13 and 25 SEER.
SEER is ideal for comparing systems in regions with fluctuating temperatures, as it accounts for periods when your HVAC system operates at partial load capacity.
What is EER?
EER stands for Energy Efficiency Ratio. Unlike SEER, it measures the air conditioner’s efficiency under specific conditions—usually at an outdoor temperature of 95°F, indoor temperature of 80°F, and 50% relative humidity. It provides a snapshot of how efficiently a unit performs under maximum stress.
- Fixed Measurement: Focuses on peak performance under prescribed conditions.
- Higher Is Better: As with SEER, a higher EER indicates greater efficiency.
- Simpler Comparison: Useful when assessing performance in consistently hot climates.
EER is particularly valuable in areas with consistently high temperatures since it evaluates how well an AC unit functions at full load capacity.
Comparing SEER vs.
| Factor | SEER | EER |
| Measurement Scope | Seasonal average | Single point at peak conditions |
| Climate Consideration | Ideal for variable climates | Best for hot and consistent climates |
| Load Evaluation | Considers partial-load operation | Based on full-load operation |
| Testing Conditions | Simulates real-world use | Fixed laboratory conditions |
How to Use These Ratings When Choosing Your Cooling System
- If you live in an area with varying temperatures across seasons, prioritize systems with higher SEER ratings as they reflect seasonal efficiency.
- For regions with consistently high temperatures or heat waves, focus on units with superior EER ratings since they excel under peak conditions.
- Higher-rated units—whether in terms of SEER or EER—tend to cost more upfront but save significantly on energy bills over time.
- If your cooling system operates continuously during summer months, both metrics become relevant; however, prioritize based on how much stress you expect your equipment to endure daily.
- Some manufacturers provide combined metrics like Integrated Energy Efficiency Ratio (IEER), which blends aspects from both SEER and EER for holistic performance evaluation.
Understanding both SEER and EER empowers you to make informed decisions tailored to your specific needs while maximizing long-term savings and environmental benefits through efficient cooling technology.
How Exhaust Works on Tankless Water Heaters and Why Proper Venting Is Essential
Tankless water heaters offer homeowners an energy-efficient, on-demand hot water solution. However, one aspect often overlooked during installation is the exhaust system. Proper venting is critical to ensure safety, performance, and the long-term durability of the unit. In this article, we will explore how exhaust works in tankless water heaters and why correct venting practices are necessary.
Understanding Exhaust in Tankless Water Heaters
Tankless water heaters operate by rapidly heating water as it flows through the unit. These exhaust gases need to be safely expelled from your home to prevent health risks and maintain proper functionality.
- Pulls fresh air from outside for combustion while expelling exhaust gases.
- Requires two pipes: one for incoming air and another for outgoing exhaust gases.
- Often used in sealed or confined spaces because it prevents indoor air contamination.
- Uses indoor air for combustion and relies on a motorized fan to push exhaust gases outside.
- Requires only one pipe for venting but needs installation in spaces with adequate ventilation.
- Generally, more adaptable to retrofit installations due to its simple design.
Why Proper Venting Is Important
Failing to install a suitable venting system can lead to several issues that affect safety, efficiency, and compliance with local building codes.
- Prevents Carbon Monoxide Buildup
A poorly ventilated tankless water heater can release harmful carbon monoxide gas into living spaces, posing a serious health hazard. Correct venting ensures all toxic gases are safely removed from your home. - Improves Energy Efficiency
Efficient venting helps maintain optimal combustion conditions inside the unit, reducing wasted fuel and lowering energy costs over time. - Prevents Corrosion
Improperly ventilated systems may trap moisture within the vents or heating unit itself, leading to rust or corrosion that could shorten the lifespan of your heater. - Complies with Building Codes
Municipal regulations often require specific types of vent materials (e. g., stainless steel or PVC) and configurations that meet safety standards.
Comparing Vent Materials
The type of material used for vents plays an important role in performance.
| Material | Pros | Cons |
| Stainless Steel | Durable; handles high temperatures well | More expensive than other materials |
| PVC Plastic | Cost-effective; lightweight | May not withstand extreme heat over time |
| Aluminum | Lightweight; easy to install | Susceptible to corrosion in damp conditions |
Best Practices for Proper Installation
- Use manufacturer-recommended materials designed specifically for your model.
- Ensure the vent pipe slope directs condensation away from the heater.
- Avoid long horizontal runs or too many bends that can restrict airflow.
- Place outdoor vents clear of windows or doors where fumes might re-enter living spaces.
- Hire licensed professionals familiar with local building codes for installation.
Properly configured exhaust systems not only safeguard your household but also enhance the performance and longevity of your tankless water heater system. Whether upgrading an old system or installing a new one, always prioritize safe and effective ventilation practices during setup.
- How to Improve HVAC Efficiency with Expert Air Conditioning Repair Miami Services
- Top Signs You Need AC Repair Miami Residents Should Know About
- Key Strategies for Enhancing Miami HVAC System Performance and Energy Efficiency
- Improving Energy Efficiency with Miami HVAC Solutions
- Five Signs You Need Immediate AC Repair Miami Services for Your Cooling System
- Why Regular Maintenance Is Key for Reliable AC Repair Miami Services